

List of the best ways to find the largest files in Windows. Sort files from largest to smallest, and locate big files on a computer, hard drive, inside a folder, and all its subfolders or entire network.
List of the top methods to find the largest files:
- Find Largest Files on Computer, HDD (SSD), Folder, or Network
- Search Large Files in Windows Explorer
- Delete Huge Files in PowerShell
- Find and Remove Big Files Using the Native Windows Disk Usage Analyzer
- Eliminating Large Duplicate Files
Many new computers and laptops use fast SDD drives in order to reduce weight and improve performance. Those SSD drives are excellent, but to reduce cost the manufacturers put in small-capacity ones as they are pricey. SSD or eMMC drives usually have 256GB and can go as low as 32 GB. That is small and you may quickly run out of disk space on your system drive. Fortunately, you can follow the steps below to clear out unnecessary files and free up disk space. In the first example, we will use File Explorer ( Windows Explorer ) to locate large files. Take a look at the second example if you want to find the largest folders too.
You can be sure that you have huge files that you do not need and that still reside in a long-forgotten folder. Such files could be installation files of already installed applications, log files, temp files, and old Windows update files. Here’s how to find your largest files.
Find the Largest Files on a Computer, HDD (SSD), Folder, or Network
This is a simpler and way more versatile solution than using File Explorer. It requires installing a free tool. If you do not like installing applications it has a free portable version that you can use too. Download and install Folder Size
- Start the tool select the drive that you want to analyze and press the “Scan Selected Drive” button. It is the one with the green arrow next to the drive list. You can also use “Scan folder…” or “Scan multiple locations…”
- From the toolbar select the “Largest files” report.
- Click the drive or folder for which you want to view the largest files in the tree view on the left
- You will find all the largest files in the currently selected drive or folder listed in the right panel
- Review the files and delete the ones that you don’t need
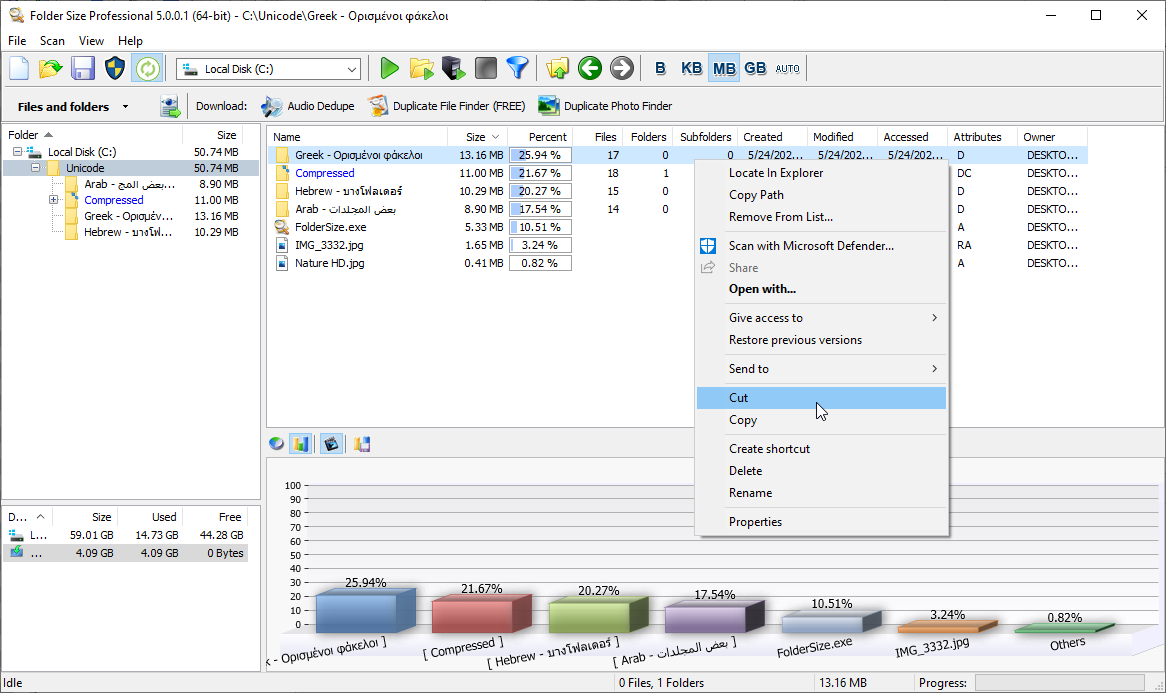
Find the Largest Files
Largest Files Report

Largest Files Report
You can access the Largest Files Report from the toolbar. There you can choose the type of report for the details view. By default, the application displays the “Files and folders” report which is similar to the one of Windows Explorer but provides details for the sizes of the folders, the count of files and sub-folders inside, and many more. To activate the Largest Files report, click the arrow next to the currently active report and select “Largest files”.
The report in this mode looks like the one in the picture above but lists the top 100 largest files in the selected folder and all its sub-folders. The additional column displays the path for every file.
Selecting a different folder from the folders list on the left instantly updates the report with the largest files inside it. There is no need to scan anything further.
Search Large Files in Windows Explorer
You can find large files in Windows 11, 10, 8, or 7 using File Explorer only. You do not need to install any additional tools. Follow the steps below to get rid of big files that you don’t need. If you want a simpler and more flexible approach take a look at the next paragraph in which I provide a powerful free solution too. Probably you have noticed that folder sizes are not available in File Explorer. You can use a free Folder Size Explorer tool to view them.
Steps to Find Large Files
- Open File Explorer (aka Windows Explorer)
- Select “My Computer” or “This PC” to search your entire computer. If you only want to look at a drive or folder then click on them instead.
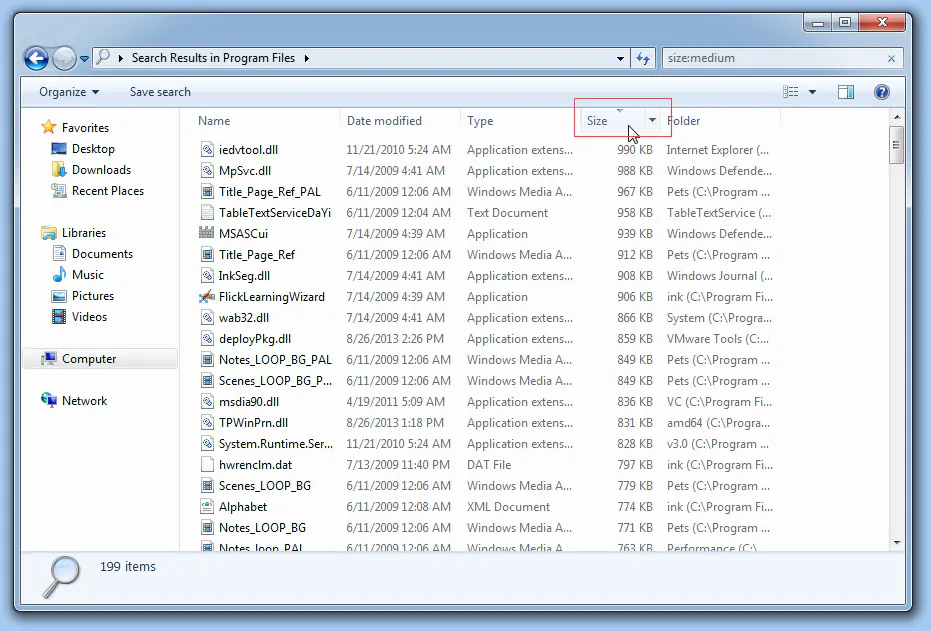
- Type “size:” in the search box.
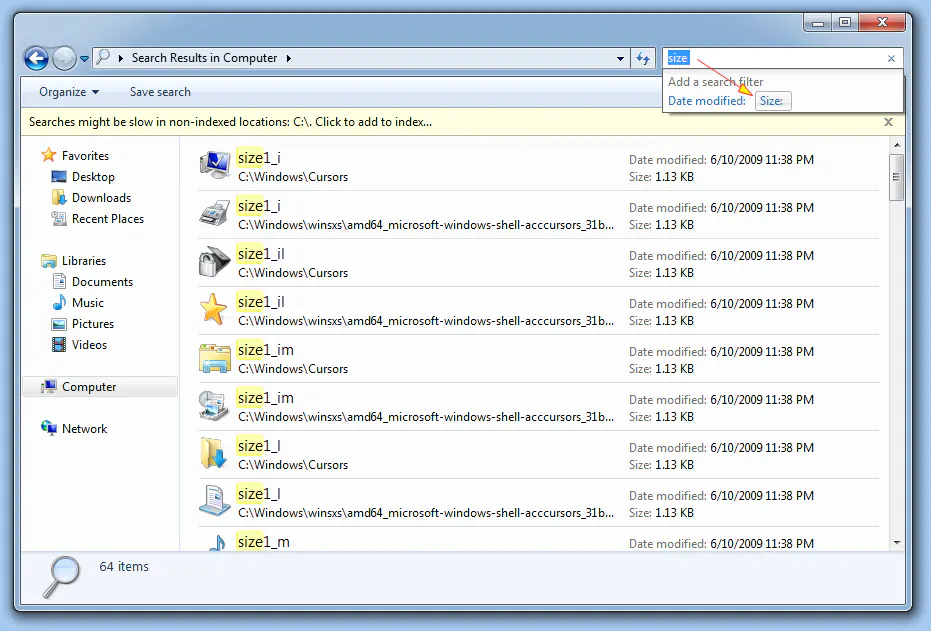
Find Largest Files in Windows Explorer
- Select the sizes that you want to search for. You have the options to search for “Empty”, “Tiny”, “Small”, “Medium”, “Large”, “Huge”, and “Gigantic”. Select the “Gigantic” option to find the largest files first.
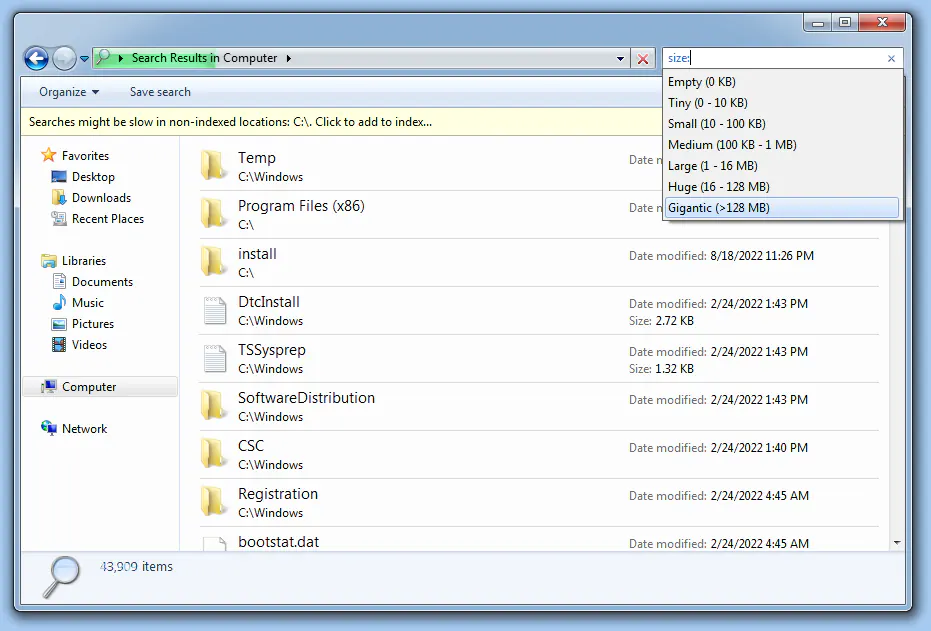
File Explorer Serch
You may have to wait a bit for File Explorer to search your whole computer. Wait until the green status bar at the top fills up. The search may take some time depending on the size and speed of your drive.
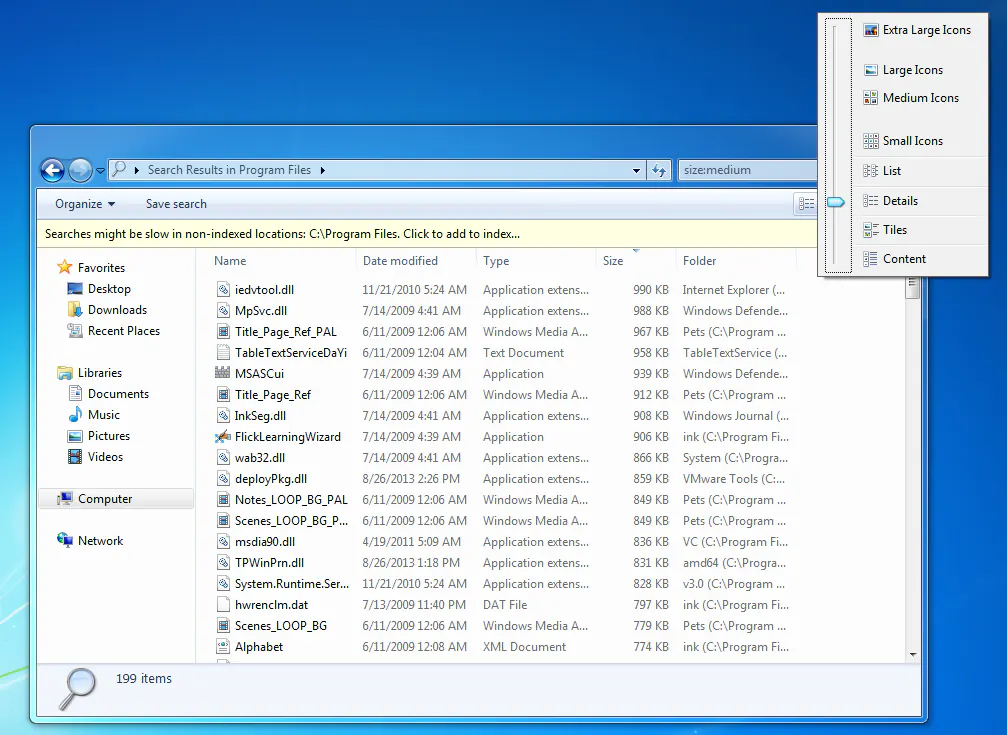
- Click the “Change View” icon at the top-right and select “Details”
Gigantic Files Details
- Click the Size column to sort the files from largest to smallest.
Sort Files From Largest to Smallest
Review the Largest Files List
Look through the list of the largest files and delete the ones that you don’t need. Most important, be careful not to delete important files. Undoubtedly, if you are not sure about a file just Google it. Certainly, you don’t want to delete important data or break a program by deleting its files. Overall, things that you can safely delete are your files. Certainly, you can easily decide if you need them or not. For example, these are music, videos, photos, old documents, etc. Unquestionably, the other type of files that you can easily get rid of is the temp and log files. Those are usually .tmp, .log, .$$$, etc. Old application installer files are something that you don’t need either. You can easily spot them as they have an installer icon and a .exe extension.
Finding Large Files in File Explorer Verdict
While you can find large files in Windows Explorer, the feature is a bit clumsy. Certainly, the fact that you have to choose a size range like “Huge”, “Gigantic” etc. is a bit unpractical. Obviously, after you get rid of the “Gigantic” files, you have to perform a new search for the “Huge” files. Then you have to search again for “Large” files and so on. For this reason, follow the instructions in the next paragraph for a simpler and much more visually pleasing solution,
Delete Huge Files in PowerShell
Follow these simple steps to find large files using Windows PowerShell:
- Open PowerShell by clicking the Start button and typing PowerShell
- Use the CD command to navigate to the drive or folder that you want to search.
CD c:\your_folder - Execute the following command:
Get-ChildItem -re -in * |

?{ -not $_.PSIsContainer } |

sort Length -descending |

select -first 10 - Review the listed large files
The filter block “?{ -not $_.PSIsContainer }” is designed to exclude directories. Subsequently, the sort command will arrange all the remaining entries by size in descending order. Finally, the select clause will permit only the first 10 entries, ensuring that only the largest 10 are displayed.
You can use an even simpler variant of the above script: gci -r | sort Length -desc | select fullname -f 10
In conclusion, while utilizing Windows PowerShell to identify large files offers a powerful method, it’s crucial to approach it with caution. The command-line interface presents a direct and efficient means of sorting through files by size. However, it’s essential to recognize the potential risks associated with executing scripts in PowerShell. Operating within the console requires a level of familiarity with scripting and commands, as well as a meticulous approach to avoid unintended consequences, such as accidentally deleting critical data. Therefore, before executing any commands, ensure you have a thorough understanding of PowerShell scripting and exercise caution to prevent any inadvertent loss of important files.
Find and Remove Big Files Using the Native Windows Disk Usage Analyzer
Accessing the Disk Usage Analyzer
- Press the Windows key on your keyboard or click on the Windows icon in the taskbar to open the Start menu.
- Type “Disk Usage Analyzer” in the search bar and press Enter.
- Alternatively, you can navigate to Settings > System > Storage to access the Disk Usage Analyzer.
Analyzing Disk Usage
- Once you’ve opened the Disk Usage Analyzer, you’ll see a list of available drives on your system, along with their respective storage usage.
- Select the drive you want to analyze by clicking on it. The tool will begin scanning the selected drive to calculate its storage usage.
Viewing Large Files
- After the scanning process is complete, the Disk Usage Analyzer will display a breakdown of disk usage, showing the largest files and folders first.
- Look for sections labeled “Large Files” or similar, which typically list the biggest files on your disk. In the example below it is the option – “Large or unused files”.
- You can click on these sections to expand them and view more detailed information about individual files.

Windows Disk Space Analyzer Largest Files
Identifying Big Files
- Scroll through the list of large files to identify those consuming the most disk space.
- Pay attention to the file names, sizes, and locations to determine which files you may want to delete or move to free up space.
- You can also sort the files by size to quickly find the largest ones.
Managing Huge Files
- Once you’ve identified the huge files that you no longer need, you can take action to manage them.
- Right-click on a file to access options such as delete, cut, copy, or move.
- Alternatively, you can open the file’s location in File Explorer to further examine its contents or perform additional actions.
Freeing Up Disk Space
- After deleting or moving extensively long files, you can check the Disk Usage Analyzer again to see how much space you’ve freed up.
- Repeat the process for other drives or folders as needed to optimize your disk usage and keep your system running smoothly.
Conclusion:
The native Windows Disk Usage Analyzer is a valuable tool for quickly identifying and managing large files on your computer. By following the steps outlined in this guide, you can efficiently locate big files, reclaim disk space, and maintain optimal performance for your Windows system.
Eliminate Large Duplicate Files
Remove Long Duplicate Documents and Files
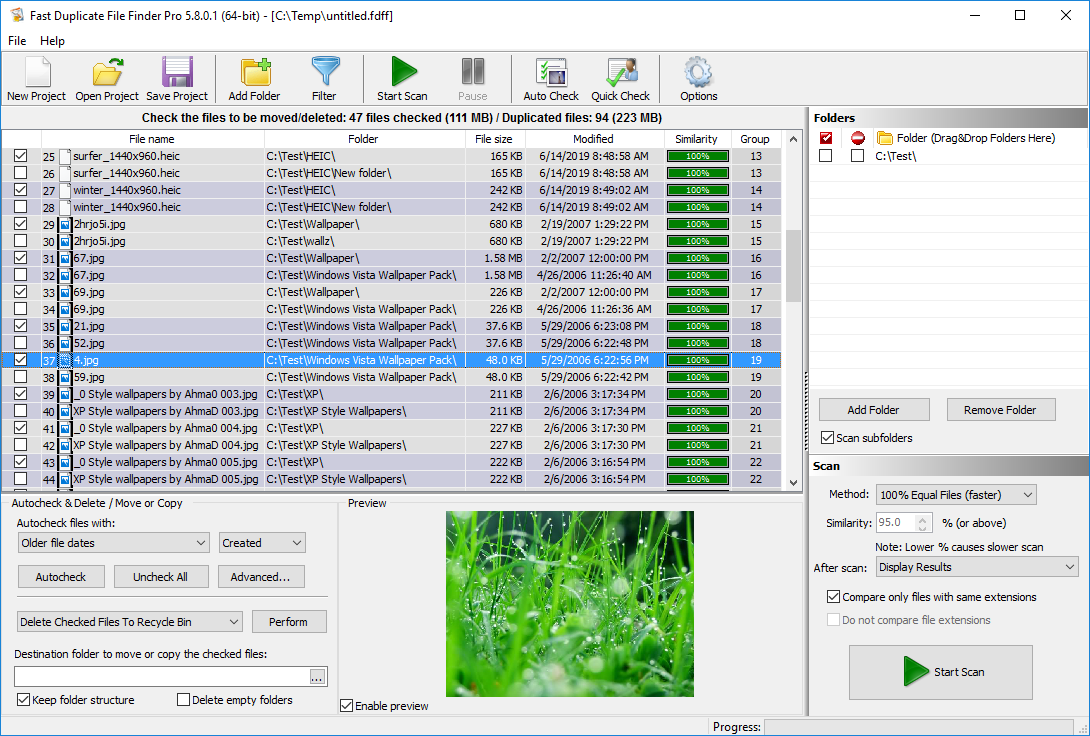
To free up additional disk space you can delete your duplicate files too. Use the Free Duplicate Finder to remove repeating files. That tool can find duplicate files even if they are in different locations and with different names. It can find similar documents and archives and also files with similar names. This is the winner of the best duplicate file finders list.
Duplicate Cleaner
Delete Lengthy Duplicate Photos in Your Image Library
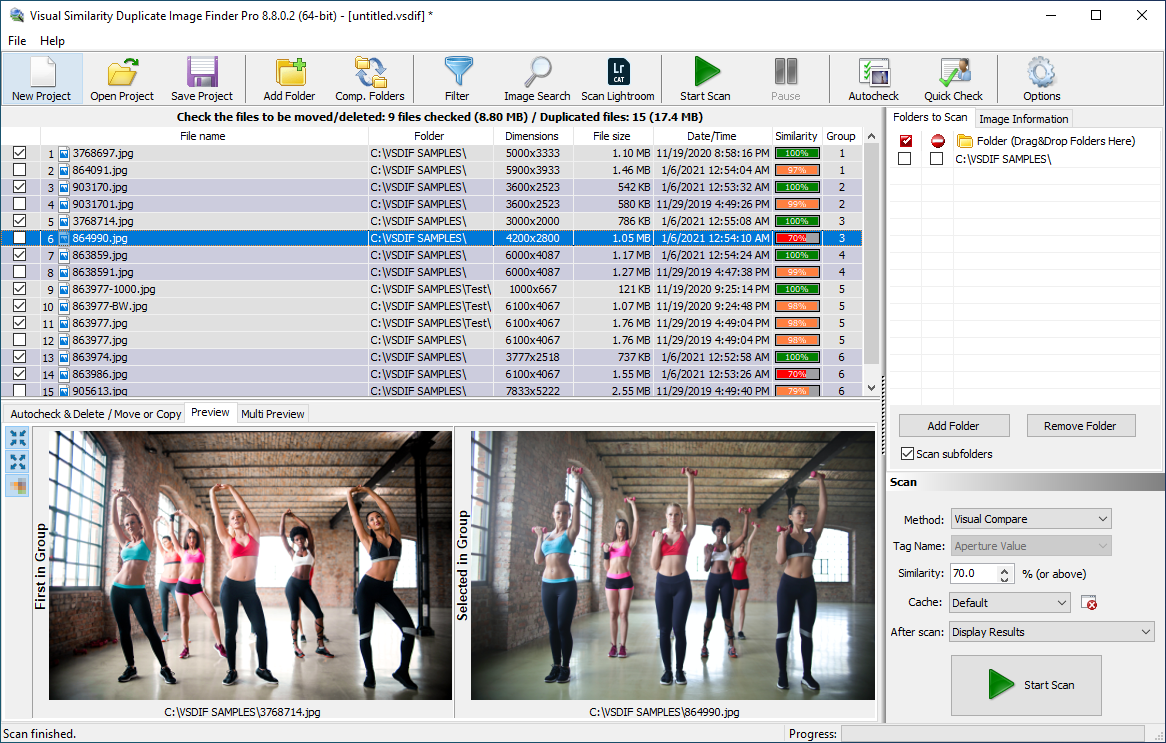
Undoubtedly, you should check your image library for duplicates too. Image files are quite large and occupy a lot of disk space. Unfortunately, the common duplicate finders can not find similar images. Please note that even if two photos are almost the same they are not duplicates – they are similar. Even if exactly the same photo is stored in different image formats, the common duplicate finders will not identify it. Therefore, You should use a dedicated tool like Visual Similarity Duplicate Image Finder for that. It is the number one choice in the list of the best duplicate photo finder tools.
Duplicate Image Finder
Eliminate Huge Duplicate Songs from Your Audio Collection
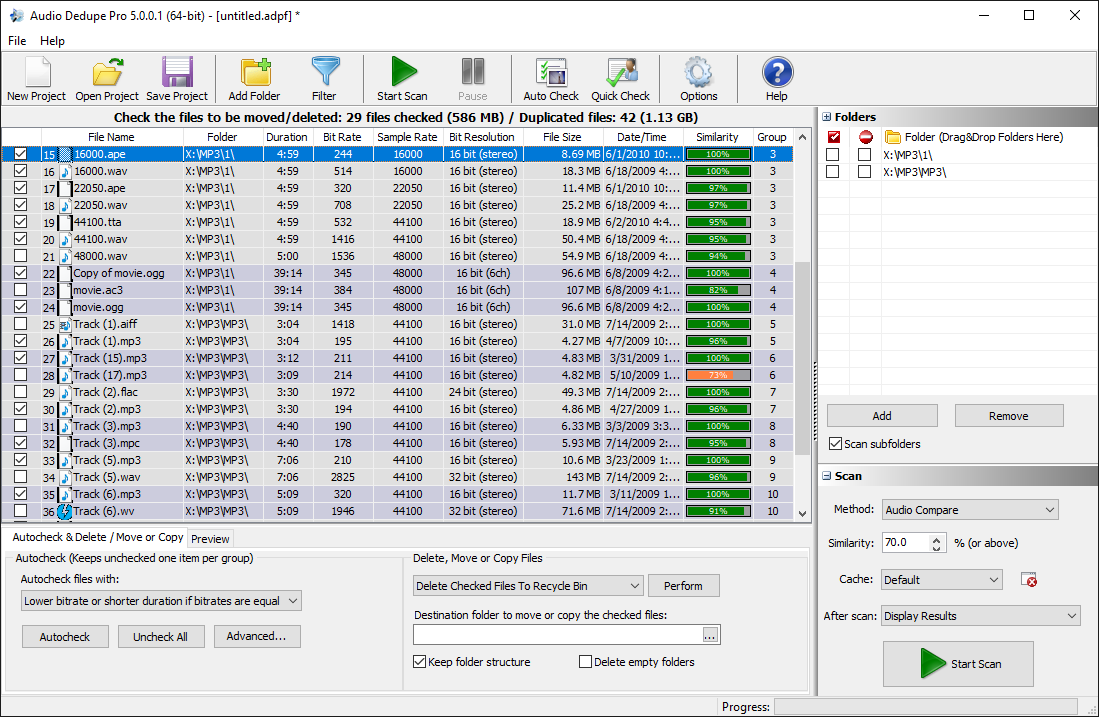
Finally, you should check your audio collection for repeating songs too. Similar to the example with the photos above, if a song is stored in different audio formats the common duplicate finders will not detect it. Audio Dedupe is a tool that can find similar and duplicate songs. It will listen to your songs in order to determine if they are similar or duplicate. Audio files are quite large so you can save a lot of disk space by deleting repeating songs.
Remove Duplicate Songs
Share this information with your friends and family. They will thank you for providing these tools that help with the free disk cleanup process.
Conclusion
In conclusion, we’ve explored the best methods to find large files on your Windows PC. Therefore, aiding in the optimization of disk space. Whether you’re using File Explorer, PowerShell, or dedicated tools like Folder Size, each approach offers its own advantages. You can choose one based on simplicity and functionality. However, it’s essential to exercise caution, particularly when working with PowerShell scripts. Those can lead to inadvertent deletions and could result in the loss of important data. Additionally, eliminating large duplicate files further enhances storage efficiency. Certainly, tools like Free Duplicate Finder and Visual Similarity Duplicate Image Finder streamline this process. By implementing these strategies, you can efficiently declutter your system. As a result, you will reclaim valuable disk space and ensure optimal performance for your Windows PC.
Pingback: Find Largest Folders in Windows 11, 10, 8, 7
Great instructions and recommendations. Both free tools – Folder Size and Duplicate File Finder work perfectly. Thank you for recommending.
Love your blog. Always useful tools!
Thank you very much for this comprehensive article. Folder Size is an excellent tool.
Very detailed article. I tried both methods, but finding largest files using Windows Explorer is much harder that using the free Folder Size app. That tool is so good in visualizing the disk space. I put it in my favorites list.
Oh thank you, thank you!!!!!
Freed up tons of wasted disk space!
Folder Size from MindGems is a total game-changer for managing disk space. Its quick scan and visual display help me instantly pinpoint and handle the largest files, making storage optimization a breeze. The integration with file management is a time-saver. Highly recommend for anyone looking to streamline their digital clutter!
Folder Size by MindGems is unparalleled in its ability to swiftly and accurately identify large files. The tool’s efficiency in scanning and presenting a comprehensive list of the biggest space consumers is truly impressive. It has become my go-to solution for effortlessly managing and optimizing disk space. If you’re looking for a tool that excels in finding large files, look no further – Folder Size gets the job done seamlessly.
I recently started using Folder Size by MindGems, and I must say it has been a game-changer in managing my computer’s storage space. The feature that stands out the most for me is the ability to effortlessly identify and handle the largest files on my system.
The visual representation of file sizes through charts and graphs is incredibly intuitive. It’s like taking a guided tour through my storage, making it easy to spot those space-hogging files that were previously hidden in the depths of my folders. This has been immensely helpful in optimizing the way I organize and store my data.
What sets Folder Size apart is its efficiency in providing accurate results. The tool swiftly scans through my files, presenting a comprehensive list of the largest items on my drive. The sorting and filtering options further enhance the experience, allowing me to focus on specific file types or sizes for a more targeted cleanup.
The integration with file management is another feature that has streamlined my workflow. Being able to take action directly from the tool, whether it’s deleting unnecessary files or moving them to another location, saves me time and effort.
In summary, Folder Size from MindGems has become an indispensable part of my digital organization toolkit. It’s not just about freeing up space; it’s about gaining a better understanding of my storage and taking control of it. If you’re looking for a reliable and user-friendly solution to identify and manage your largest files, I highly recommend giving Folder Size a try.
Thank you for sharing this great free tool!
One standout feature of Folder Size by MindGems that I absolutely love is its use of beautiful charts to visually represent file sizes. Navigating through my storage space has never been this insightful and aesthetically pleasing. The charts not only make it easy to identify the largest files but also add a touch of elegance to the entire user experience. Kudos to MindGems for combining functionality with visual appeal!