
Duplicate File Finder - How To Find Duplicates
Remove Duplicate Files - How To Eliminate Repeating Files

Please follow this short tutorial to learn the basics of the tool.
You can find detailed information about every feature in the application by pressing F1 on your keyboard. The context-sensitive help will display the help section for the window that is currently displayed.
Do not forget to check also the blog area as it contains a lot of information, tutorials and examples and provides a search option for easier navigation: www.mindgems.com/article/
How To Find Duplicate Files
Start the program. The main window will appear.
Find Duplicate Files
This is a simple tutorial, but if you have difficulties, questions, or doubts you should read: All About Duplicate Cleaner in Windows 11, 10, 8, 7
That article will let you learn all the basics of our duplicate finder tools and let you learn how to confidently get rid of duplicates.
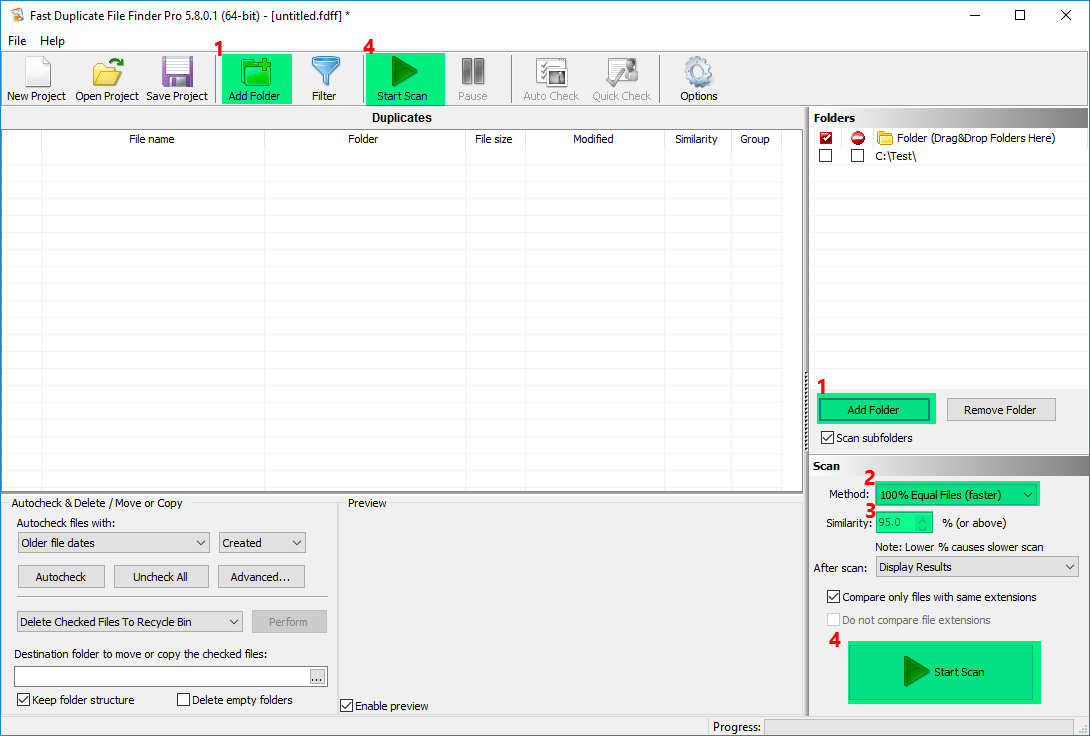
1) Add the folder(s) to be scanned using "Add Folder" button (1)
Note: Self-scan can be disabled for a folder using the checkbox in front of the folder name. This will force the application not to compare the items inside with each other - they will be compared only with items in the other folders in the list.
2) Choose the scanning "Method" (2) to be used, e.g. to scan for 100% exact duplicates select "100% Equal Files" and to scan for similar files select Similar Files
3) For Similar Files method, adjust the "Similarity" (3) value. 95% is set as default and produces the best results for regular use. Lowering the similarity value will slow the scan speed and may produce false positives. The similarity mode is designed for documents and binary files and should be ran on a subset of files. Please do not run this mode on your entire hard drive as it will take extremely long time to complete. This mode is not designed to find similar photos or audio files - we have dedicated tools for that and you can read why here: Which Duplicate File Finder to Choose.
4) If filtering is necessary it should be applied prior to starting a scan using the "Filter" button on the toolbar.
5) Press "Start Scan" button (4)
After the scan process is finished the following screen is displayed:
Duplicate File Finder Result
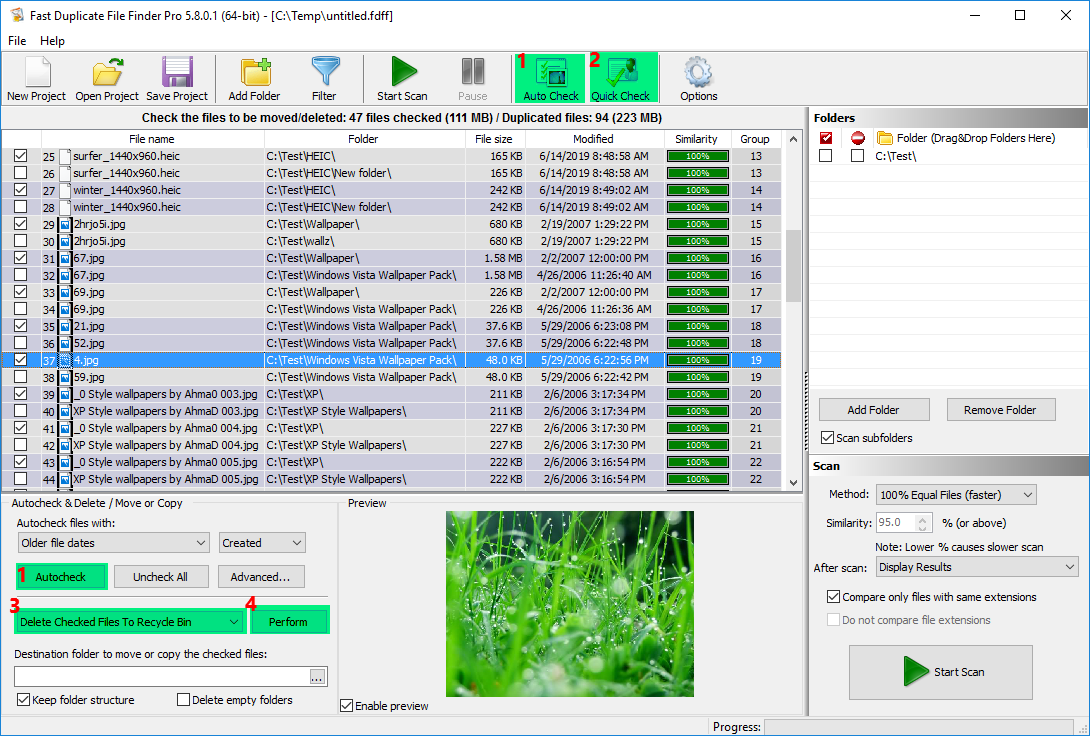
Duplicate files are grouped together with different color. Depending on the "Auto Check" settings, the program automatically marks the files with older file dates. If files are un/checked manually, "Auto Check" button (1) or "Quick Check" (2) can be used to clear the changes.
After checking which files should be moved/copied or delete and choosing the corresponding operation (3) pressing the "Perform" button (4) will execute the selected operation.
The duplicates list supports multiple files selection and multiple files can be selected using the mouse and Ctrl/Shift keys. "Checked" and "selected" files are different terms and should not be confused. The selected files can be deleted from the list using the Delete key or deleted from the hard drive using the Shift+Delete key.