

Complete guide on how to show hidden files and folders in Windows and macOS, including system files that stay hidden even after enabling “Hidden items” in File Explorer.
Best ways to show hidden files and folders:
- Show All Hidden Files, Including System Files, With Folder Size
- Show Hidden Files in Windows File Explorer
- Show Hidden File Extensions
- Show Hidden Files on Mac
- Show Hidden Files FAQ
Show All Hidden Files, Including System Files, With Folder Size
Windows’ built-in “Hidden items” setting only goes so far. Even with it switched on, critical system files and folders – System Volume Information, hidden volumes, and system backups – still don’t show up in File Explorer, leaving you unable to see exactly where your disk space is going.
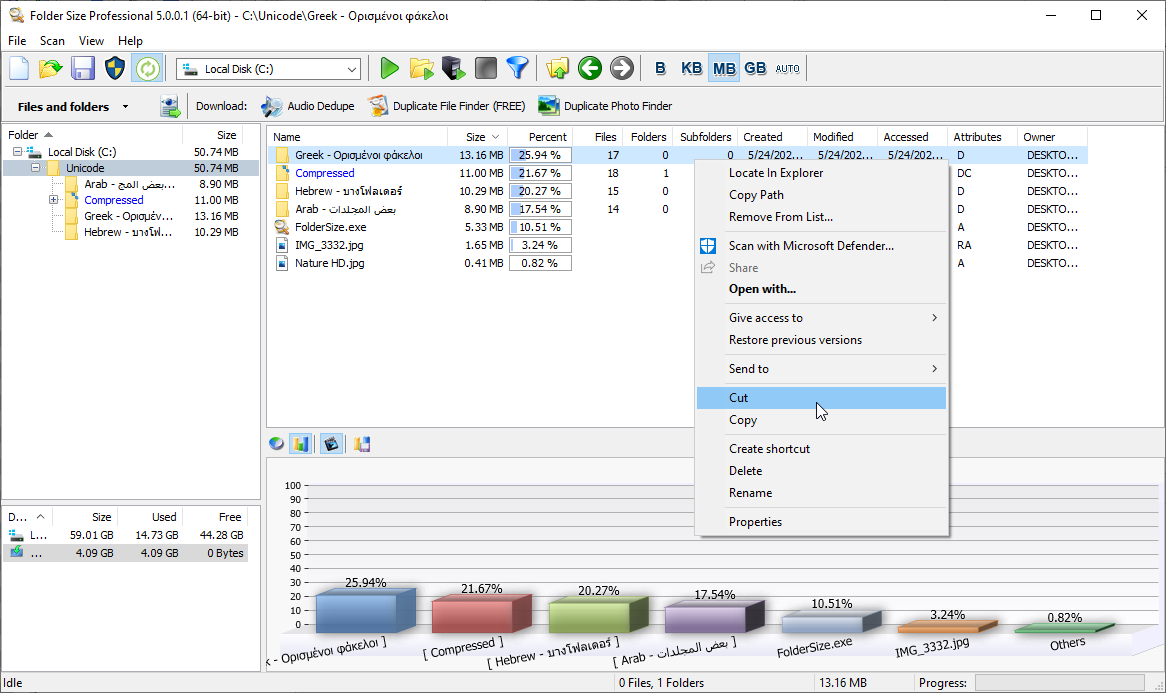
Folder Size, a free disk space analyzer, is the most complete way to solve this. It lists every hidden file and folder on a drive – including the ones File Explorer never displays under any setting – giving you the only fully accurate picture of your disk space.
Show Hidden Files and Folders
Why File Explorer Falls Short
Turning on “Hidden items” in File Explorer reveals ordinary hidden files, but Windows deliberately keeps certain system-critical folders concealed regardless of that setting, since they’re needed for functions like System Restore. File Explorer simply doesn’t list them – Folder Size does.
What Folder Size Shows That File Explorer Can’t
- Complete Visibility: Lists every hidden file and folder, including System Volume Information, hidden volumes, and backups that File Explorer omits entirely.
- Full Disk Space Breakdown: Shows exactly where space is going, including inside files and folders Windows keeps out of view.
- File Type Analysis: Categorizes files by type so you can see what’s actually consuming space, hidden or not.
- Customizable Reports: Generates a disk usage report covering the full drive, not just what File Explorer is willing to show.
Steps to Use Folder Size
- Download and Install: Get Folder Size from the official download page and install it.
- Launch as Administrator: Open Folder Size, click “Run As Administrator,” then select the drive or folder to analyze.
- Run the Scan: Start the scan and let Folder Size analyze the selected drive or folder, including hidden system items.
- Review the Results: Use the breakdown to see hidden files and folders alongside regular ones, and delete anything unnecessary.
For files hidden only through Windows’ standard visibility setting rather than system protection, the built-in File Explorer options below will also work – but for a complete view that includes what Windows keeps hidden no matter what, Folder Size remains the most thorough solution.
Show Hidden Files in Windows File Explorer
Windows 11
- Open File Explorer from the taskbar.
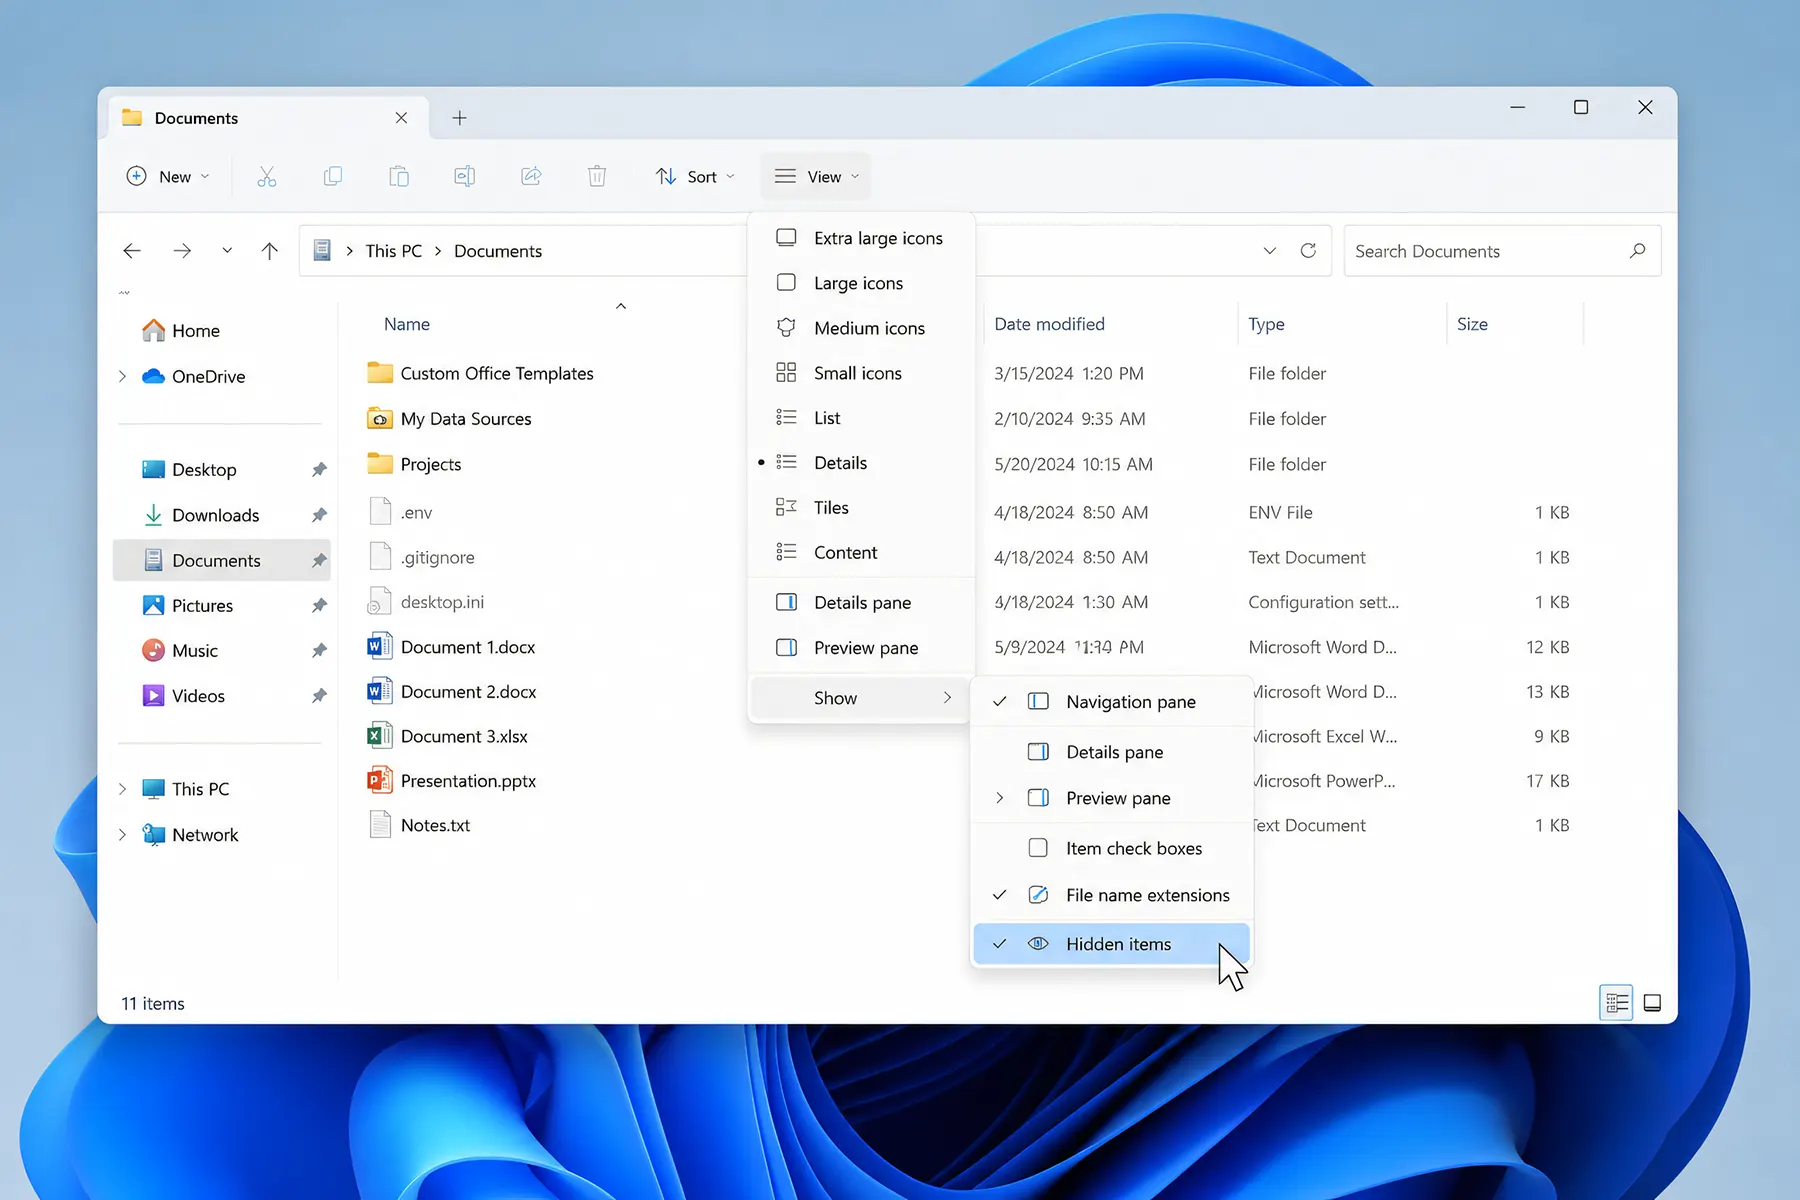
- Select View > Show > Hidden items.

Show Hidden Files and Folders in Windows 11
Windows 10
- In the search box on the taskbar, type “show hidden files” and select “Show hidden files” from the search results.
- Under File Explorer, click the highlighted “Show settings” link next to “Change settings to show hidden and system files.”
- In the Advanced settings, select “Show hidden files, folders, and drives,” and then click OK.
Windows 8.1
- Swipe in from the right edge of the screen and select Search (or, with a mouse, point to the upper-right corner, move down, and select Search).
- Type “folder” in the search box and select “Folder Options” from the results.
- Select the View tab.
- Under Advanced settings, select “Show hidden files, folders, and drives,” and then click OK.
Windows 7
- Click the Start button, then go to Control Panel > Appearance and Personalization.
- Select “Folder Options” and then the View tab.
- Under Advanced settings, select “Show hidden files, folders, and drives,” and then click OK.

Show Hidden Files in Windows
Show Hidden File Extensions
File extensions – .txt, .jpg, .exe – tell both you and Windows how to handle a file. By default, Windows hides these, which can cause confusion and, in some cases, security risks.
Why Showing File Extensions Matters
- Security: Malware can disguise executables as harmless files –
photo.jpg.exedisplays asphoto.jpgwhen extensions are hidden, tricking users into opening it. - Better File Management: Visible extensions make it easier to sort files by type and confirm they’ll open with the right application.
- Avoiding Mistakes: Renaming a file with a hidden extension can accidentally strip it – turning
document.pdfinto an unusable file nameddocument.
Windows 11 and Windows 10
- Open File Explorer: Click the File Explorer icon in the taskbar or press
Win + E. - Access Folder Options: Click the “View” tab, then click “Options” to open Folder Options.
- Show Extensions: In the Folder Options “View” tab, scroll to “Hide extensions for known file types,” uncheck it, and click “OK.”

Show File Extensions Windows 11, 10
Windows 8.1
- Open Search: Swipe in from the right edge and tap “Search,” or point to the upper-right corner with your mouse and select “Search.”
- Find Folder Options: Type “folder” and select “Folder Options” from the results.
- Show Extensions: In the “View” tab, uncheck “Hide extensions for known file types” and click “OK.”
Windows 7
- Open Control Panel: Click Start, then select “Control Panel.”
- Access Folder Options: Go to “Appearance and Personalization,” then click “Folder Options.”
- Show Extensions: In the “View” tab, uncheck “Hide extensions for known file types” and click “OK.”

Show Hidden File Extensions
Show Hidden Files on Mac
macOS hides system and dotfile-prefixed files (like .DS_Store) from Finder by default. Unlike Windows, there’s no menu toggle – it’s done with a keyboard shortcut.
- Open Finder.
- Navigate to the folder where you want to see hidden files.
- Press
Cmd + Shift + .(period). - Hidden files and folders will appear dimmed, alongside your regular files.
- Press
Cmd + Shift + .again to hide them once you’re done.
This shortcut works in any Finder window and any Open/Save dialog across macOS, without needing to change a system-wide setting.
Conclusion
For everyday hidden files – the ones Windows or macOS hide by default but will show with a setting change – the built-in options above are all you need. But if you’re trying to see exactly where your disk space is going and want visibility into system-protected folders that File Explorer won’t display under any setting, Folder Size is the only tool that shows the complete picture, and it’s free.
Wow, this article is a lifesaver! I’ve been struggling with managing my files because I couldn’t see the file extensions. The step-by-step guide made it so easy to enable hidden file extensions in just a few minutes. Now I can see exactly what file types I’m dealing with, which is crucial for my tech projects. No more guessing games or accidental file mishandling. This has really improved my workflow and file organization. Thanks for the clear and concise instructions, MindGems! You’ve made my tech life so much easier.
Thanks for the detailed steps! I never realized how important it was to show file extensions until I read this article. It’s definitely helped me avoid some big mistakes, like accidentally opening suspicious files. I followed the instructions and now I can easily see all the extensions, which is super helpful for my work. This guide was straightforward and easy to follow, even for someone like me who isn’t very tech-savvy. This has given me more control over my files and peace of mind. Great job!
Great post! Enabling file extensions has made my file management so much easier and more secure. As a programmer, it’s vital to know the exact file types I’m working with, and this guide helped me do just that. The steps were clearly outlined and easy to follow, and I appreciated the detailed explanations. This article has not only helped me avoid potential errors but also increased my productivity. I can now quickly identify and manage my code files without any confusion. Keep up the good work, MindGems!
Super helpful guide! I followed the steps and now I can finally see all my file extensions. This has been a game changer for organizing my photos. As a photographer, it’s essential to differentiate between RAW files, JPEGs, and other formats, and this article provided a clear and effective way to do that. The instructions were easy to understand and implement. I feel much more organized and in control of my photo library now. Thanks for such a useful and practical article!
This article makes it so easy to show hidden file extensions. I feel much safer knowing I can now spot potential malware at a glance. The instructions were clear and straightforward, which made the process simple to follow. Being able to see file extensions helps me quickly identify suspicious files and avoid any potential security threats. This has definitely enhanced my overall computer safety. Thanks for sharing such valuable information, MindGems! This is a must-read for anyone looking to improve their file management and security.