
1) Start the program. Select File - New Project from the menu. Go to Files tab. The following screen will appear:
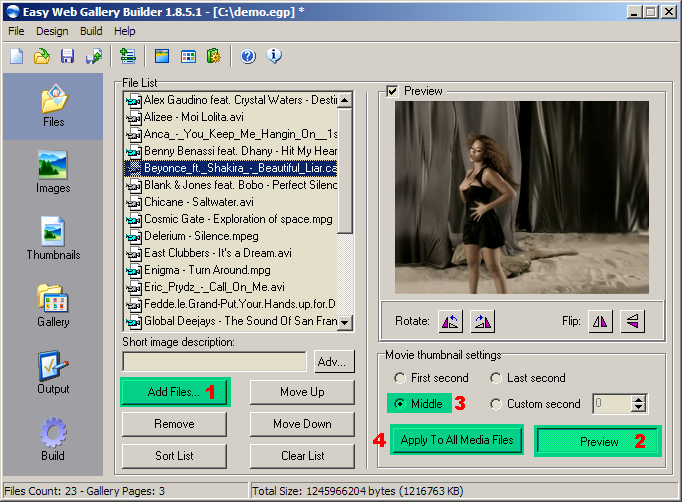
Press "Add Files..." button (1) and select the images you want to add to the gallery. You can sort the files list pressing "Sort List" button or arrange them as you like by selecting the files from the File List and pressing "Move Up" or "Move Down" buttons. You can select multiple files holding down Ctrl or Shift key and selecting the files with mouse click.
For every image you can set a custom description using Short image description edit box which description could be shown under the thumbnail and/or above the big image on the image pages.
2) Go to Gallery Settings - General tab. The following screen will appear:
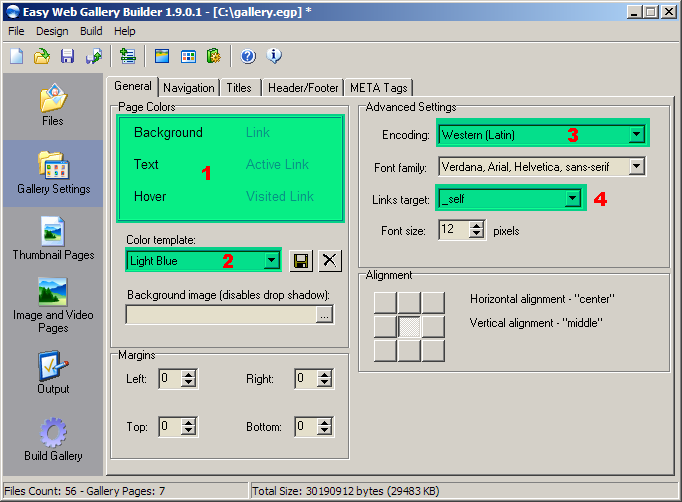
Choose your gallery colors by clicking on Page Colors (1) or using predefined Color template (2). If your gallery uses non-Latin letters select the appropriate Encoding (3) from the combo box. Select the Links target (4) which defines frame or window in which the linked files will load. See Gallery Settings General help for details.
3) Go to Gallery Settings - Navigation tab. The following screen will appear:
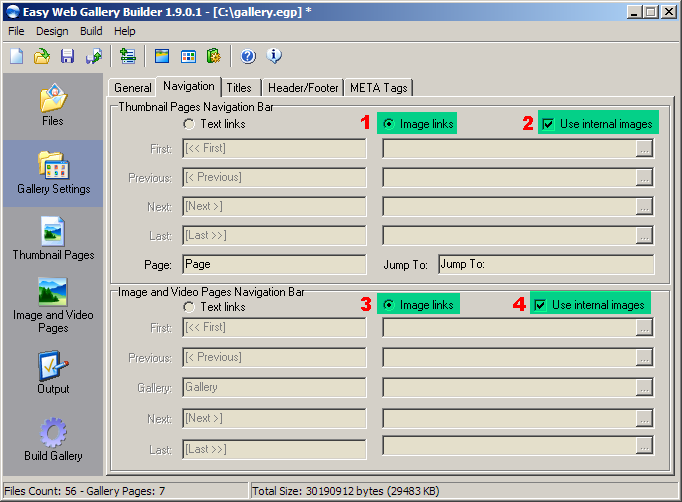
Select Image links (1) and (3) and check Use internal images (2) and (4) . The program allows you to choose between text and image links for navigation between pages and images. We will use the internal images for our gallery.
4) Go to Image and Video Pages - Images tab. The following screen will appear:
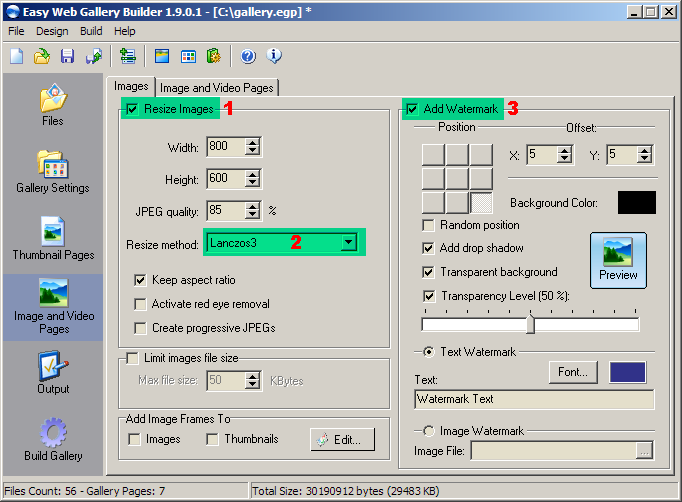
If you want to resize your images, so they can be loaded faster in your web site, check "Resize Images" (1) and adjust the settings below. The most important settings are images Width and Height (in pixels) and the Resize method (2). The recommended resize method is Lanczos3. There are other resize methods, which are faster but produce resized images with lower quality. All resized images will be saved in JPEG format. The recommended JPEG quality setting is 85%. Not that with higher quality setting the created files have bigger file size.
You can optionally add watermark to the images by checking "Add Watermark" (3) and adjust the settings below. Most of them are self-explanatory and you can see how your watermarked images will look by pressing the "Preview" button.
5) Go to Image and Video Pages - Images and Video Pages tab. The following screen will appear:
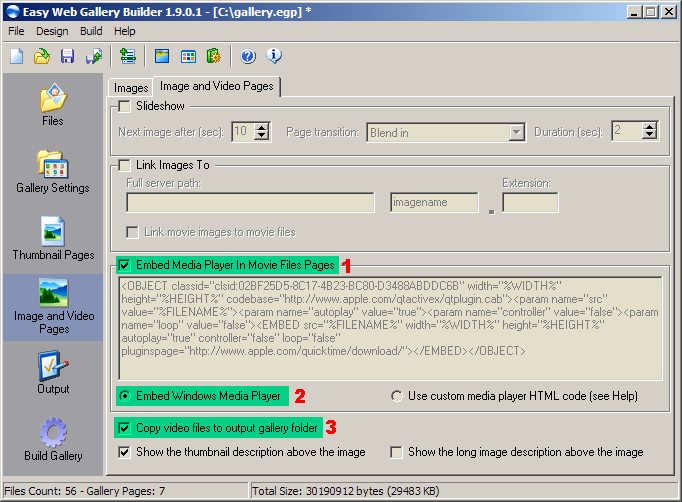
Check Embed Media Player In Movie Files Pages (1) and select Embed Windows Media Player (2). You can optionally check Copy video files to output gallery folder (3) if you want the movie files to be automatically copied to the gallery folder.
6) Go to Output tab. The following screen will appear:
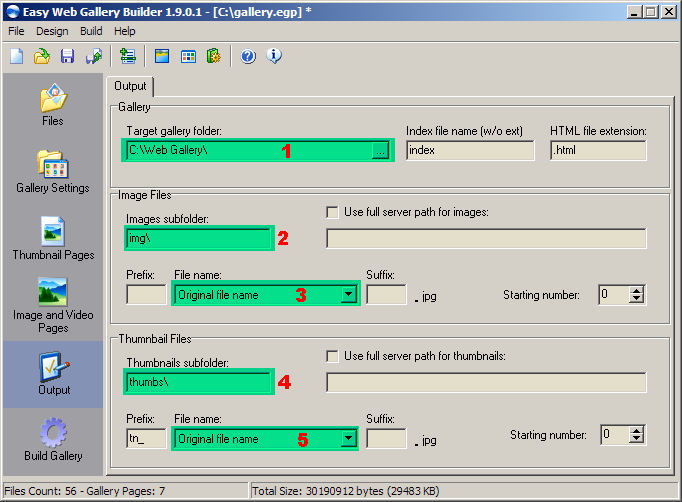
Specify the Target gallery folder (1) in which the gallery will be created. Type the Images subfolders (2) name where the thumbnail images will be stored. By default the images are stored in img\ subfolder of the target gallery folder. Then select what will be the output image file names in File Name (3). Type the Thumbnails subfolder (4) name where the thumbnail images will be created. By default the thumbnails are created in thumbs\ subfolder of the target gallery folder. Then select what will be the output thumbnails file names in File Name (5).
7) Go to Build Gallery tab. The following screen will appear:

Select how you want to treat the existing files (if any) in the target gallery folder by checking the Existing Files (1) option. Then press Build Gallery (2) button and wait until the gallery is created. After the gallery is created you can quickly access its folder using Open Target Folder (3) button.